2021年08月17日
Editing Classic Skin 2
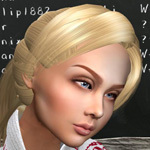
Following the previous article. Let me introduce an example to edit classic skins, that is to make the skin texture off-line and upload it, the same way to create a new skin. When editing existing skins, it is necessary to download the skin texture to the PC. The circled area in the picture is the texture, but I do not know how to download it directly. If anyone knows, please teach me!

The only way I know is to use “Print Screen” and cut out the skin area. The skin texture should be square but the size is free. I am using 512-512 since it is convenient for uploading. If there is no need to use transparent area, JPEG can be used as the format. If this picture was set in PC, the skin editing process was half completed. If you are interested in, please copy the picture below, modify it as you like, and then upload. Do not forget to use an editable skin and keep a back-up.

These are the skins I used last time which were modified by Photoshop. The total color was changed on the left, and lip area was changed on the right.

For the skin creating there are templates provided by Linden. The left is for head. The colors on the edges show the connecting spots to other parts. The black area has no meaning. The right shows a layer added to a skin. This will be used to judge the area to be changed. It is important to note that this is not a shape. The area of eyes, nose, or mouth should exactly follow this template. If the mouth or nose were expanded here, on the avatar it simply ends up with lipstick painted out of mouth, or texture next to nose.

With this method it might be possible to make crimson tongue or to paint teeth with rainbow color. To create new skins, there are many sites in the net, so please see them.


Pin2 Face
Halloween at Bar Sachiko
huge breasts
Sachiko's New Outfit
Pin2 Disappeared
Farewell, Mogu
Halloween at Bar Sachiko
huge breasts
Sachiko's New Outfit
Pin2 Disappeared
Farewell, Mogu
Posted by Temi Oyen at 18:05│Comments(0)
│Faces